Take control of your energy project with clear, step-by-step advice from experienced Renogy engineers. This short guide lays out what you need to plan, choose, and connect hardware so your project runs smoothly.
Whether you are a first-time DIYer or a seasoned hobbyist, the resources and videos available in 2026 make complicated tasks easier to follow. You will learn basic safety checks, wiring tips, and common troubleshooting steps.
The focus is practical. Start with smart planning, follow industry-standard practices, and finish with a secure electrical hookup. These pages aim to give you confidence to manage each stage of the installation and to build a durable, efficient setup that lasts.
Understanding Flexible Solar Panel Installation
Understand how adaptable modules let you use more roof or vehicle area for power.
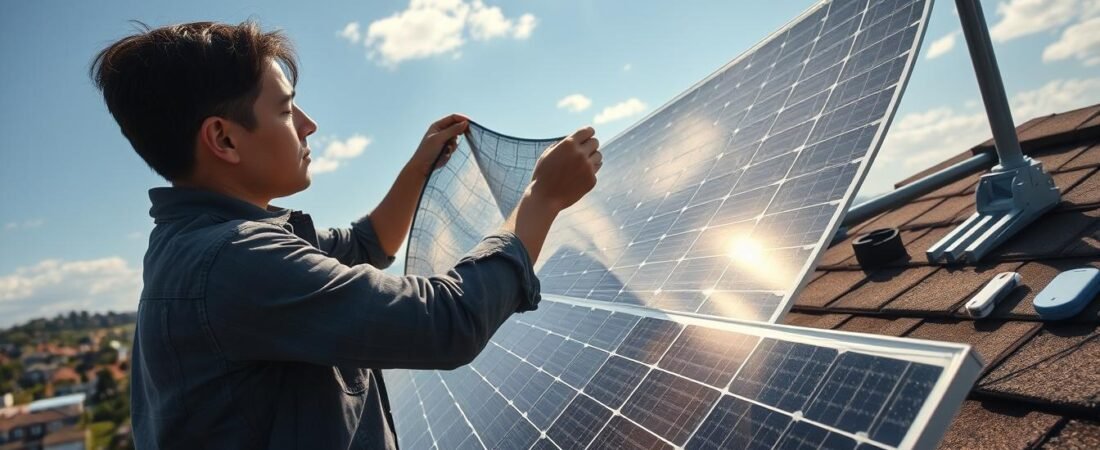
These lightweight panels let you maximize available surface on curved roofs and vehicle tops. Many people choose flexible panels because they bend to match contours and reduce wind drag. The result is more usable area and steady energy output for camping or remote work.
EcoFlow 100W units are a good example: they deliver a 23% efficiency rating and can flex up to 258 degrees. That efficiency makes them competitive with rigid panels and useful across many off-grid applications.
Mixing types is often smart. Combine portable solar panels with mounted modules to keep your battery charged while driving or parked. Understanding your vehicle’s roof layout and typical power needs is the first step to optimal performance.
- Maximize surface area on curved roofs for better output.
- Pair portable units with roof-mounted panels for redundancy.
- Match types and wattage to your battery and system needs.
Essential Tools and Safety Precautions
Start by assembling essential tools and confirming safety measures for a smooth, damage-free setup.
Handling items with care matters. Always remove rings or jewelry before you touch any modules to avoid scratches or breaks. Keep new modules covered while you work to prevent accidental charge buildup and light exposure that can complicate wiring.
When working at heights, use a sturdy ladder and wear slip-resistant shoes. Use insulated tools to lower the risk of electrical shorts. Maintain tools like your sealant applicator gun so your work stays clean and professional.
Handling Panels Safely
Protect the delicate surface from sharp objects and debris. Work on soft, flat supports when moving a module. Avoid flexing the cells beyond the manufacturer’s limits to prevent damage and reduce long-term maintenance needs.
Required Hardware
Assemble a tidy kit: insulated pliers, torque-rated fasteners, sealant, and the right tape. 3M VHB tape is a proven method for mounting and gives a strong bond without drilling holes.
- Protect all electrical components, including the junction box, from water ingress.
- Label cables and keep connectors dry to prevent accidental charge or shorts.
- Bring a spare fuse and a small battery tester to check charge during setup.
For step-by-step safety rules and a deeper checklist, see our DIY safety tips.
Planning Your Solar Layout
Begin with a roof sketch that shows sun paths and obstructions for all seasons.
Mark each location on the roof with a wax pencil before you fix anything. This prevents shading from vents or air conditioners and lets you test different layouts quickly.
Leave about 20 mm between panels for cable routing and thermal expansion. That gap helps keep connectors accessible and reduces stress when temperatures change.
Check the surface weight rating before mounting. Confirm the roof can support the full array and add reinforcement if needed. Use Dicor Lap self-leveling sealant to seal any drilled holes on fiberglass or membrane roofs.
Plan cable paths so batteries and inverters sit near the array. A tidy layout makes wiring faster and improves overall system efficiency.
| Layout Step | Tip | Why it matters |
|---|---|---|
| Mark positions | Wax pencil outlines | Prevents shading and misalignment |
| Spacing | 20 mm gap between units | Allows cable routing and expansion |
| Surface check | Confirm weight capacity | Ensures safe, long-term support |
| Battery placement | Near array, protected | Simplifies wiring and boosts power efficiency |
Surface Preparation Techniques
Prep is the unseen work that keeps mounts firm for years on the road.
Start by clearing the area of dust and grime. Wash the chosen area with soapy water and rinse well. Let the surface dry completely before the next step.
Next, degrease with isopropyl alcohol to remove oils or wax. Use a lint-free cloth and change sides often. A proper clean ensures the adhesive bonds to the surface, not to dirt.
Ventilation and gap method
The Vented Gap Kit uses twin-wall polycarbonate strips to create an airflow channel between the panel and the roof. This airflow reduces heat buildup and extends the life of the module and the roof material.
“Proper surface preparation is the most important step to ensure your adhesive bond remains strong for years of travel.”
- Apply VHB tape only on a dry, clean surface; moisture weakens the adhesive.
- Check around the junction box periodically so water or debris does not collect.
- Route cables with small gaps to avoid pinching and to allow airflow beneath the array.
Final check: a tidy, dry surface and a vented gap help your panels hold fast at highway speeds and protect battery charge and system power over time.
Mounting Methods for Rigid and Flexible Surfaces
Pick a mounting approach that balances strength, airflow, and ease of service. The right method depends on the surface, travel demands, and materials you use.
Adhesive Tape Applications
High-strength VHB tape works well on smooth roof areas and many curved surfaces. Apply strips across the width so the tape can handle thermal movement.
Tip: Clean and degrease first, press firmly, and allow cure time before driving. This keeps the bond reliable and helps protect the battery and system from sudden drops in output.
Screw Mounting Procedures
Screw mounting is the most secure option for rigid surfaces and roof racks. Use sealant around every fastener to stop leaks and corrosion.
Sunman eArc units can be stiffened with C-channel or flat bar before you fasten them to a rack. That reduces stress on screws during vibration and rough road use.
Canvas Installation
Fabric roofs and tents need non-invasive fixes. Use zippers, Velcro, or sewn pockets so the module stays in place without tearing the material.
Always leave small gaps for air. Trapped air raises temperature and lowers efficiency, so route cables and leave vents where possible.
- Choose hardware rated for vehicle vibration.
- Allow airflow under the module to prevent overheating.
- Prioritize secure seals and service access for long-term safety.
Managing Thermal Expansion and Airflow
Heat and movement are the two hidden stresses that can shorten the life of your array. Surfaces and panels expand at different rates. That mismatch stresses adhesive and fasteners over time.
Keep air moving under each unit. A vented gap method creates a channel for cool air to flow beneath the array. This lowers temperatures and improves long-term efficiency.
Without airflow, temperatures can exceed 85°C and cause permanent damage to the substrate or the junction box. Hot spots also strain the tape and may lead to failure.
- Allow a clear gap for ventilation and thermal movement.
- Check adhesive tape edges and add vents if panels feel too warm.
- Keep cables and the battery box shielded from concentrated heat.
| Risk | Prevention | Why it matters |
|---|---|---|
| Thermal expansion | Leave 10–20 mm gap; use vented kits | Reduces stress on tape and mounts |
| Heat buildup | Create airflow channels under panels | Prevents substrate and electrical damage |
| Adhesive failure | Use rated tape and allow movement | Maintains mounting strength at temperature swings |
Connecting Panels to Your Electrical System
Map the electrical path first so voltage, amps, and protections match your equipment.
Series and Parallel Configurations
Wiring in series raises voltage while keeping current steady. This is useful when you need higher input for a charge controller or inverter.
Wiring in parallel raises current while keeping voltage the same. Use this when your battery bank needs lower voltage and more amps.
Integrating with Power Stations
Use a compatible charge controller when mixing types of panels and when feeding a portable power station like the EcoFlow DELTA 2. The DELTA 2 accepts direct solar input and gives AC, DC, and USB-C outputs for appliances and charging.
Follow a simple wiring method:
- Confirm battery voltage and match the controller input.
- Decide series or parallel based on voltage needs.
- Connect panels to the controller, then to the battery or power station.
“Neat, secured cables prevent stress on the junction box and reduce failure risk.”
Finish with checks: tidy cables, torqueed terminals, and a quick load test to verify steady output. Regular inspections keep your system reliable and extend battery life.
Ongoing Maintenance and Care
Simple, regular checks keep your system delivering steady power and prevent small issues from becoming costly repairs.
Clean the surfaces with neutral soap and clean water. Use a soft sponge and rinse well. If you operate in a marine area, always wash with fresh water to remove salt and protect electrical components.
Inspect mounting screws and adhesive tape every few months. Tighten loose screws and watch tape edges for peeling. Replace any worn tape (use VHB-rated products) to keep the array secure on the roof of your vehicle or structure.
Check the junction box and cables for water ingress or loose connections. Clear debris from around the modules to maintain airflow and efficiency. Small obstructions can cut output and cause hot spots.
“A short seasonal checklist prevents downtime and extends the system’s useful life.”
- Clean with mild soap; rinse thoroughly.
- Inspect screws, tape, and seals; retighten as needed.
- Contact a professional if you find corrosion, wiring damage, or persistent leaks.
Conclusion
Wrap up your project with a few simple checks to protect performance on the road. Take time to inspect mounts, seals, and electrical connections. These quick steps cut failure risk and extend service life.
Regular maintenance and careful surface prep are the backbone of a long-lasting array. Prioritize airflow under each unit to reduce heat and avoid stress on adhesives and fasteners.
With the right tools and a clear plan, this DIY path is rewarding and practical. If you want help or a final system review, see our services for professional support.